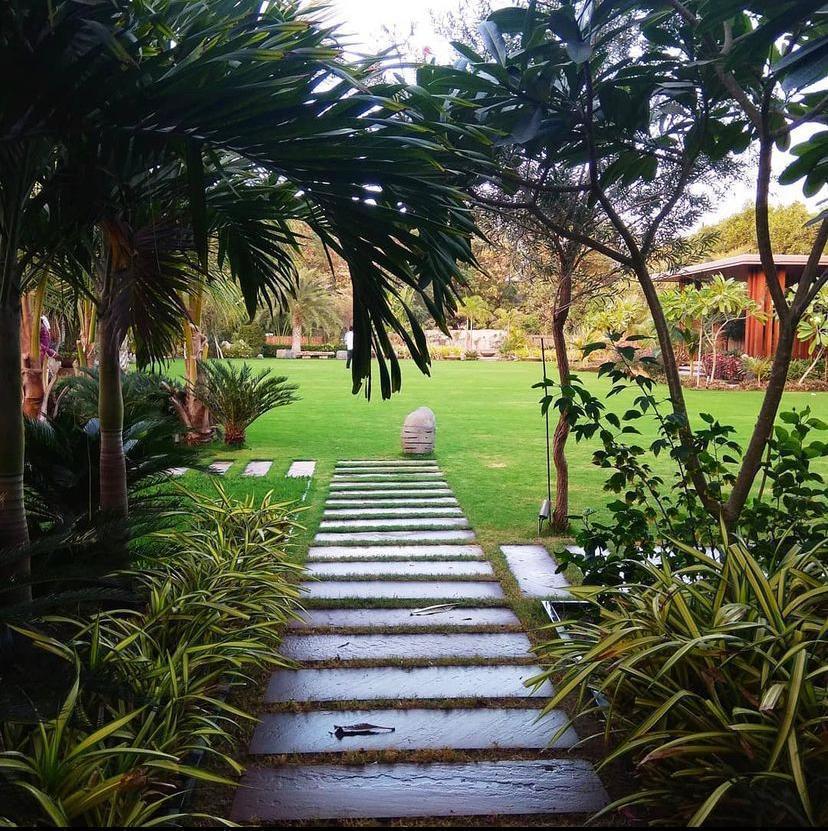
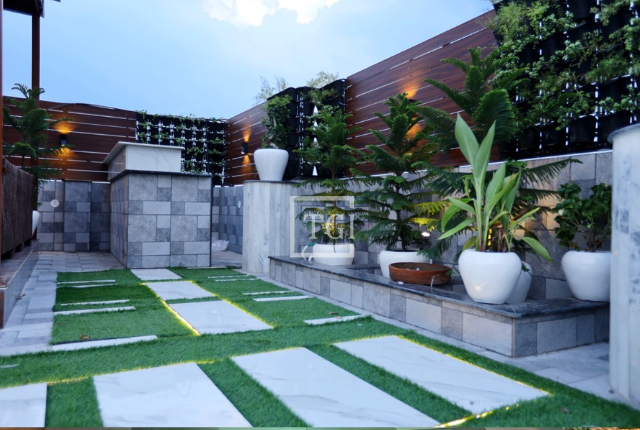
Pathways

Pathways are essential elements in landscaping that provide functional and aesthetic connections between various parts of a garden, yard, or outdoor space.

Pathways are essential elements in landscaping that provide functional and aesthetic connections between various parts of a garden, yard, or outdoor space. They serve as routes for walking, define traffic flow, and contribute to the overall design and accessibility of the area.

1. Planning:

  • Purpose: Determine the purpose of the pathway. Is it for practical reasons, such as accessing a garage or shed, or is it primarily for aesthetics, leading to a garden feature or seating area?
  • Traffic Flow: Analyze how people will use the pathway and where it will connect to other areas. Consider foot traffic patterns and the most convenient routes.
  • Design Style: Decide on the style and materials that best suit your landscape. Pathways can be formal, informal, rustic, or modern, depending on your preferences.

2. Material Selection:

  • Choose Materials: Select suitable materials for the pathway. Common options include gravel, stone, concrete pavers, bricks, flagstone, wood chips, or even crushed shells, depending on your desired look and budget.
  • Consider Climate: Keep in mind your local climate, as certain materials may be better suited for cold winters, hot summers, or rainy seasons.

3. Layout and Design:

  • Pathway Shape: Determine the shape and width of the pathway. Straight paths are formal and direct, while curved paths create a more natural, flowing look.
  • Edging: Consider using edging materials like bricks or stones to define the pathway’s boundaries and prevent erosion.
  • Patterns: Experiment with different patterns or layouts, especially if you’re using pavers or bricks. Herringbone, running bond, and basket weave are common patterns.

4. Excavation and Preparation:

  • Excavate: Remove the top layer of soil or existing materials to the depth required for your chosen pathway material. This depth can vary but often ranges from 3 to 6 inches, depending on the material and intended use.
  • Base: Create a sturdy, well-compacted base layer using gravel or crushed stone. Ensure proper grading to allow for water drainage.

5. Installation:

  • Lay Material: Install the chosen pathway material according to your design. Follow manufacturer recommendations for spacing and alignment if using pavers or bricks.
  • Leveling: Ensure the pathway is level and even as you proceed. Use a level or a straight edge for this purpose.
  • Secure Pavers: If using pavers, bricks, or stones, consider securing them in place with sand or gravel between the joints. This helps prevent movement over time.

6. Finishing Touches:

  • Edging: Install or maintain edging along the sides of the pathway to keep the materials in place and provide a neat appearance.
  • Filler Material: Add filler material like sand or fine gravel between pavers or stones, if applicable.
  • Landscaping: Incorporate landscaping elements like plants, shrubs, or mulch beds along the sides of the pathway to enhance its visual appeal.

7. Maintenance:

  • Regular Care: Maintain the pathway by regularly sweeping, weeding, and cleaning it to keep it looking tidy.
  • Repairs: Address any damage or settling promptly. Replace damaged or sunken pavers, reapply joint filler, and address erosion issues.